
Last year I joined the IoT enthusiasts and went out to build my own smart mirror. For those unaware, a smart mirror is a double-sided mirror that sits in front of a display attached to a computer, Raspberry Pi being the popular choice. This post aims to provide an overview of the choices made during development. If you’re looking for a more detailed guide on the hardware behind building a magic mirror, check out Dylan Pierce’s blog post as well as this video by HackerHouse.
The Monitor
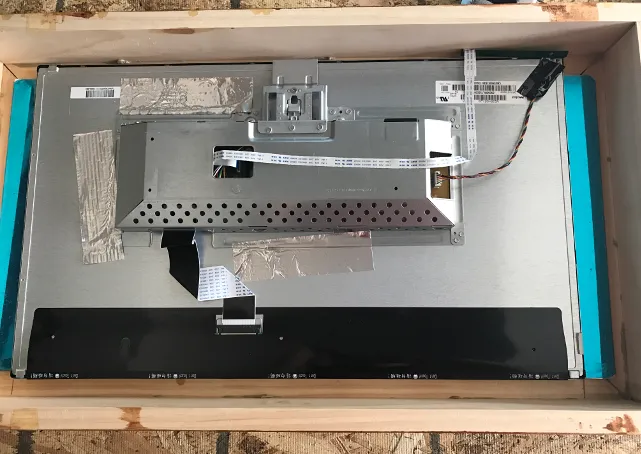
Your display should to be your starting point. Since the size of your monitor dictates the size of your frame, you need to select a size before you go out and start buying materials. I recommend going bigger if you can. I got lucky and found a 25” IPS monitor on craigslist that worked great. You’ll want a bright monitor that has HDMI output as it is the only native support for Raspberry Pi. Oh, and you have to be content with removing the bezel from your monitor.
The Mirror
I experienced a bit of choice paralysis deciding on the material of the see-through mirror. There are basically two options, glass and acrylic:
| Factor | Acrylic | Glass |
|---|---|---|
| Weight | lighter | heavier |
| ”Fun house” effect | susceptible | none |
| Light passage | more | less |
| Price | less | more |
| Chance of breaking | low | high |
| Smudge resistance | nope | nope |
For these reasons, I chose to go with this 12” x 24” 3mm thick acrylic mirror (non affiliate link). I can see why some builders choose glass over acrylic. The rigidness of the glass prevents bends and warps in the mirror. This is that “fun house” effect I mentioned above. However, the light passage on most of these mirrors, even the ones that are specifically targeted towards smart mirror builders still didn’t seem to have enough light passage to create a display that really pops. I think this video illustrates this well. There is a third option, mirror film, which is applied over a standard mirror. This seems to be a fairly popular choice for builders going for larger displays, like a big bathroom mirror. I didn’t investigate much into these, but you can find plenty of information about them in this builder forum.
The Box
Building the casing and front-facing frame is likely the most taxing and time consuming part of the build process. It’s helpful to have someone with at least some basic carpentry skills at your side for this part. Thankfully I had my stepfather, Dave, to help me here. Many guides recommend using 2 x 4’s to build the casings. However, we went with a 1 x 3 approach which resulted in a really slim and sleek looking case. We used similar boards to build the frame for the front. I won’t go into the details here since the dimensions of your frame will be different than mine, but it’s best to not over-think and do whichever works best for the type of mirror you’d like to build.
There are some select guides I’ve not mentioned that recommend using nails to secure the frame. An easier approach is to use glue, liquid nails or otherwise, to secure the boards together and then use screws for additional security. The screw sizes should depend on the thickness of your boards, just ask your local home depot dude! What I’ve gather from the MM community is that glue is a better and more reliable solution.
MAKE SURE YOUR MIRROR IS VENTILATED. Seriously, this thing generates heat, so make sure you’ve considered airflow, especially with a wooden frame. I drilled several ~2.5” holes at the top and the bottom of my frame that gives the electronics enough breathing room to not burn the house down.
The Software
I highly recommend using MagicMirror² as starting point for the code that will power your mirror. MM² is equipped with powerful guides, a capable API, and plenty of community members who are willing to help you. Configuration is easy and extensive. I was able to get my mirror up and running while only having to write a few lines of code. MM² projects are built using modules, each controlling a contained component of the interface. There are some default modules to get you going, such as a weather forecast widget, clock, news feed, and a few others.
My favorite part about this platform is the large number of third-party modules that are being developed and supported by the community. There are all sorts of modules ranging from IOT device management, voice control, media players, modules to manage other modules, and even one for facial recognition! There is also a template module for integrating your own projects into MM². I decided to include two additional modules into my mirror. One was to display my most recent emails, a pretty simple setup, and another to integrate some layer of voice control via Google Voice Assistant. Mostly, I use this to toggle the monitor display. The latter was a bit more difficult and involved diving into the Raspberry Pi video documentation.
Conclusion

Here is what I discovered after one year with the mirror:
- Building a MM is a fun way to explore basic carpentry skills and get introduced to IOT stuff.
- Magic mirrors will add heat to your room, so be cautious if building in a warm environment (I don’t really use mine during the summer).
- MM² is a great place to get started with open source development. The templates they provide make it easy to integrate your existing apps into a MM module.